Quick Webserver Setup with Nginx on Ubuntu
Overview
During assessments I often have to spin up a webserver to host a few files. For example, when exploiting an XML injection or to host a JavaScript file that I might use in a Cross-Site Scripting (XSS) attack. I try and keep my cloud footprint minimal so when I’m done with the server I just destroy it. As I was putting this blog together I wanted a minimal stack and since I was setting this up again, I wanted to document it for others.
So Why not user Docker? I do, but one of my goals with this website is to get back to basics again. I also think it's important to be able to do this without relying on additional tooling and there's plenty of other guides out there for that.
So here's an outline of what we're going to do in this guide:
- Create a non-root
sudouser with SSH access - Disable the
rootuser from SSH login - Install Nginx
- Configure the firewall
- Setup a simple HTTP site
- Configure HTTPS by using
certbootto install a Let's Encrypt SSL certificate - Double check the TLS configuration with QualysSSL and testssl.sh
Hope you enjoy!
Prerequisites
Any guide has to start somewhere and if we didn’t lay down some pre-requisites, we would be here for a while. This guide is going to assume that you have the following already:
- Server (virtual, container, or otherwise)
- Domain name and DNS configured to point to your server
- SSH access to the server
- sudo privileges (we’ll setup a sudo user, but you should have root access to start)
Update and Upgrade
First, login to your sever as the root user:
$ ssh root@your_server_ip_address
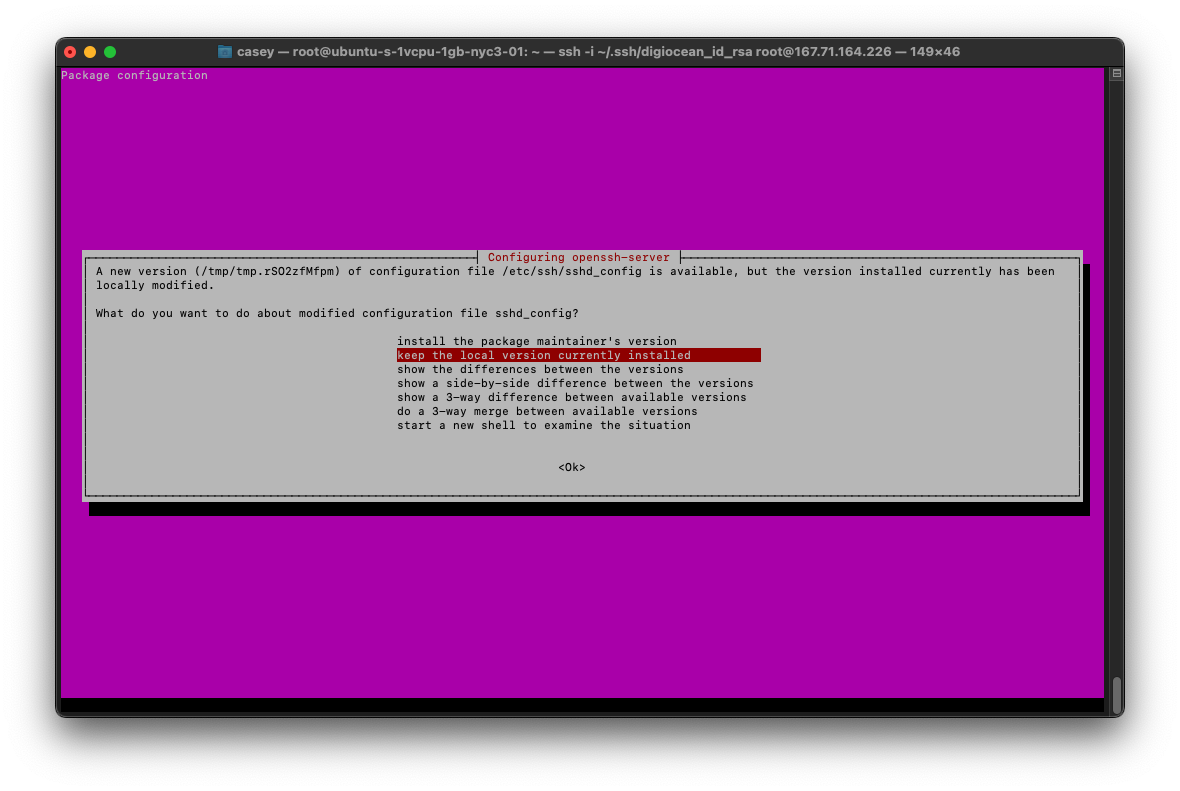
Let's check for updates and upgrade the system if needed. If you're prompted regarding a new sshd_config
version, go with the default option of keeping the local currently installed version and just hit enter.
# apt -y update && apt -y upgrade
That may take a few minutes to complete and your versions might be different, but as a reference here's the Linux version I'm using:
$ uname -srmpio
Linux 6.11.0-18-generic x86_64 x86_64 x86_64 GNU/Linux
User management
When setting up a server for any reason or handling authorization in custom applications, we should always follow the Principle of Least Privilege. Any user account should only have the minimum access needed. If additional privileges are needed to perform a task, then the elevation of privileges should be as small of a timeframe as possible and for a specific task.
I also highly recommend disabling root access on any server, public facing or not. Our task now is to add a
normal user, grant that user sudo privileges, enable SSH access and disable root's
SSH access.
Add our normal user
Let’s start by creating a new user named casey with the adduser command (of course
change this to whatever username you want to use to login to your server).
# adduser casey
You’ll be asked to set a password and a few questions. We won’t be using this password for SSH access to our server, but make sure it’s a strong one. Answer the other question or leave them blank and just press enter until the command finishes.
info: Adding user `casey' ...
info: Selecting UID/GID from range 1000 to 59999 ...
info: Adding new group `casey' (1000) ...
info: Adding new user `casey' (1000) with group `casey (1000)' ...
info: Creating home directory `/home/casey' ...
info: Copying files from `/etc/skel' ...
New password:
Retype new password:
passwd: password updated successfully
Changing the user information for casey
Enter the new value, or press ENTER for the default
	Full Name []:
	Room Number []:
	Work Phone []:
	Home Phone []:
	Other []:
Is the information correct? [Y/n] Y
info: Adding new user `casey' to supplemental / extra groups `users' ...
info: Adding user `casey' to group `users' ...
Next, to allow us to run privileged commands we’ll add casey to the sudo user
group:
# usermod -aG sudo casey
Let’s double-check that our groups are correct:
# groups casey
You should see the sudo group appear in the list for the user.
casey : casey sudo users
And just to really confirm our casey user has sudo access, let’s switch to that
user and try it out.
# su - casey
Since we’re now in an unprivileged account we need to use sudo to elevate our privileges. Let’s
just check to make this works by listing the files in the /root home directory:
$ sudo ls -la /root
Your output might look different, but if everything is configured correctly, we should see the file listing and not an access denied error:
[sudo] password for casey:
total 28
drwx------  4 root root 4096 Feb 28 00:10 .
drwxr-xr-x 19 root root 4096 Feb 27 22:05 ..
-rw-r--r--  1 root root 3106 Oct  7 08:35 .bashrc
drwx------  2 root root 4096 Feb 28 00:10 .cache
-rw-r--r--  1 root root    0 Feb 27 22:05 .cloud-locale-test.skip
-rw-r--r--  1 root root  161 Oct  7 08:35 .profile
drwx------  2 root root 4096 Feb 27 22:05 .ssh
-rw-r--r--  1 root root  241 Feb 28 00:30 .wget-hsts
Now in order to allow us to SSH into our server with our new user, we need to create the authorized_keys
file and add our public SSH key to it. First create the .sshfolder in our home folder for our
user:
$ mkdir /home/casey/.ssh
Back on your host machine copy the contents of your public key and then add it to your authorized_keys file (which probably doesn’t exist at this point, but the following will append it to the file if it does exist or create the file):
$ echo "paste your public key here" >> ~/.ssh/authorized_keys
And just to verify cat the file and double check that your key is in there.
$ cat ~/.ssh/authorized_keys
Now we can test that we can SSH in as our new user. Exit from our user shell and the root login shell back to your host machine.
$ exit
# exit
Now, on our host machine, let’s attempt to SSH into the server with our new user:
$ ssh -i your_private_key casey@your_server_ip_address
Assuming all is good and we’re able to SSH in as this user, we can move onto disabling the root
user SSH access.
Disable root SSH Access
First, lets backup the existing sshd_config. Our change is minor, but backing up default configs
is a good habit to get into.
$ sudo cp /etc/ssh/sshd_config /etc/ssh/sshd_config.orig
Now open /etc/ssh/sshd_config in your favorite editor:
$ sudo nano /etc/ssh/sshd_config
Find the following directive for PermitRootLogin:
...
#LoginGraceTime 2m
PermitRootLogin yes
#StrictModes yes
#MaxAuthTries 6
#MaxSessions 10
...
Change PermitRootLogin from yes to no. Note, don’t comment it out like
I often mistakenly do and then wonder why root can still login.
...
#LoginGraceTime 2m
PermitRootLogin no
#StrictModes yes
#MaxAuthTries 6
#MaxSessions 10
...
Save that change and restart the sshd daemon:
$ sudo systemctl restart ssh
It’s always a good idea to get into the habit of verifying things are working before moving on:
$ sudo systemctl status ssh
You should see something similar and that the service is active.
● ssh.service - OpenBSD Secure Shell server
     Loaded: loaded (/usr/lib/systemd/system/ssh.service; disabled; preset: enabled)
     Active: active (running) since Fri 2025-02-28 00:46:00 UTC; 16s ago
 Invocation: 618c83b8133d450cadb2736b4fde994c
TriggeredBy: ● ssh.socket
       Docs: man:sshd(8)
             man:sshd_config(5)
    Process: 3292 ExecStartPre=/usr/sbin/sshd -t (code=exited, status=0/SUCCESS)
   Main PID: 3294 (sshd)
      Tasks: 1 (limit: 1110)
     Memory: 1.2M (peak: 1.5M)
        CPU: 64ms
     CGroup: /system.slice/ssh.service
             └─3294 "sshd: /usr/sbin/sshd -D [listener] 0 of 10-100 startups"
Now, let’s just verify that the root user is unable to login. Back on your host machine attempt
to SSH as root:
% ssh -i your_private_key root@your_server_ip_address
root@your_server_ip_address: Permission denied (publickey).
Looks good! Here on out, we'll be doing everything as our new low privileged user.
Installing Nginx
Install the Nginx package:
$ sudo apt -y install nginx
Installing:
  nginx

Installing dependencies:
  nginx-common

Suggested packages:
  fcgiwrap  nginx-doc  ssl-cert

Summary:
  Upgrading: 0, Installing: 2, Removing: 0, Not Upgrading: 0
  Download size: 643 kB
  Space needed: 1811 kB / 22.6 GB available
...
Created symlink '/etc/systemd/system/multi-user.target.wants/nginx.service' → '/usr/lib/systemd/system/nginx.service'.
Setting up nginx (1.26.0-2ubuntu3.2) ...
* Upgrading binary nginx                                                                                                                                       [ OK ]
Processing triggers for man-db (2.12.1-3) ...
Processing triggers for ufw (0.36.2-6) ...
Scanning processes...
Scanning linux images...

Running kernel seems to be up-to-date.

No services need to be restarted.

No containers need to be restarted.

No user sessions are running outdated binaries.

No VM guests are running outdated hypervisor (qemu) binaries on this host.
Once installed the Nginx service should already be running:
$ systemctl status nginx
● nginx.service - A high performance web server and a reverse proxy server
     Loaded: loaded (/usr/lib/systemd/system/nginx.service; enabled; preset: enabled)
     Active: active (running) since Sun 2025-03-02 02:07:53 UTC; 41s ago
 Invocation: 76cace9d3c0548c29e42b173d35f6602
       Docs: man:nginx(8)
    Process: 1560 ExecStartPre=/usr/sbin/nginx -t -q -g daemon on; master_process on; (code=exited, status=0/SUCCESS)
    Process: 1561 ExecStart=/usr/sbin/nginx -g daemon on; master_process on; (code=exited, status=0/SUCCESS)
   Main PID: 1590 (nginx)
      Tasks: 2 (limit: 1109)
     Memory: 2M (peak: 4.6M)
        CPU: 57ms
     CGroup: /system.slice/nginx.service
             ├─1590 "nginx: master process /usr/sbin/nginx -g daemon on; master_process on;"
             └─1593 "nginx: worker process"
Let’s also check that Nginx is also listening on port 80 (the default HTTP port):
$ sudo lsof -i -P -n | grep LISTEN
systemd      1            root   60u  IPv4   6604      0t0  TCP *:22 (LISTEN)
systemd      1            root   61u  IPv6   6608      0t0  TCP *:22 (LISTEN)
systemd-r  450 systemd-resolve   15u  IPv4   4593      0t0  TCP 127.0.0.53:53 (LISTEN)
systemd-r  450 systemd-resolve   17u  IPv4   4595      0t0  TCP 127.0.0.54:53 (LISTEN)
sshd       917            root    3u  IPv4   6604      0t0  TCP *:22 (LISTEN)
sshd       917            root    4u  IPv6   6608      0t0  TCP *:22 (LISTEN)
nginx     1590            root    5u  IPv4  11528      0t0  TCP *:80 (LISTEN)
nginx     1590            root    6u  IPv6  11529      0t0  TCP *:80 (LISTEN)
nginx     1593        www-data    5u  IPv4  11528      0t0  TCP *:80 (LISTEN)
nginx     1593        www-data    6u  IPv6  11529      0t0  TCP *:80 (LISTEN)
Looks good! Now onto the firewall.
Configure and Enable the Firewall
By default, Ubuntu does not enable the firewall, so let’s configure that and turn it on.
$ sudo ufw status
Status: inactive
The ufw firewall makes it easy to add routes to it and we can see the applications it's aware of:
$ sudo ufw app list
Available applications:
  Nginx Full
  Nginx HTTP
  Nginx HTTPS
  Nginx QUIC
  OpenSSH
Since we’ll be configuring Nginx with HTTPS later on, we’ll just use the Nginx Full app which is
both HTTP and HTTPS.
$ sudo ufw allow 'Nginx Full'
Rules updated
Rules updated (v6)
I also confirm that OpenSSH is also enabled by ufw, as if it’s not, you will not be
able to SSH into the server as any user since the OpenSSH service will be blocked by the firewall.
$ sudo ufw allow 'OpenSSH'
Rule added
Rule added (v6)
Check that everything looks good using the ufw verbose flag. You should see port 22, 80, and 443
allowed:
$ sudo ufw status verbose
[sudo] password for casey:
Status: active
Logging: on (low)
Default: deny (incoming), allow (outgoing), disabled (routed)
New profiles: skip

To                         Action      From
--                         ------      ----
80,443/tcp (Nginx Full)    ALLOW IN    Anywhere
22/tcp (OpenSSH)           ALLOW IN    Anywhere
80,443/tcp (Nginx Full (v6)) ALLOW IN    Anywhere (v6)
22/tcp (OpenSSH (v6))      ALLOW IN    Anywhere (v6)
Double-check the above before enabling the firewall, particularly making sure OpenSSH is still allowed. The command will warn you about disrupting existing connections.
$ sudo ufw enable
Command may disrupt existing ssh connections. Proceed with operation (y|n)? y
Firewall is active and enabled on system startup
At this point, I usually make sure that I can access the default Nginx page through my browser. Note that if,
like me, you’re using a .dev domain name, many browsers will force redirect any
.dev domain to HTTPS. Since we don’t have HTTP configured yet, you’ll probably not be able to
access it in a common browser.
Instead you can use curl to check. Use your server IP since we don’t have Nginx configured with
a domain yet.
% curl -i http://your_server_ip
HTTP/1.1 200 OK
Server: nginx/1.26.0 (Ubuntu)
Date: Sun, 02 Mar 2025 19:06:25 GMT
Content-Type: text/html
Content-Length: 615
Last-Modified: Sun, 02 Mar 2025 18:28:11 GMT
Connection: keep-alive
ETag: "67c4a33b-267"
Accept-Ranges: bytes

<!DOCTYPE html>
<html>
<head>
<title>Welcome to nginx!</title>
<style>
html { color-scheme: light dark; }
body { width: 35em; margin: 0 auto;
font-family: Tahoma, Verdana, Arial, sans-serif; }
</style>
</head>
<body>
<h1>Welcome to nginx!</h1>
<p>If you see this page, the nginx web server is successfully installed and
working. Further configuration is required.</p>

<p>For online documentation and support please refer to
<a href="http://nginx.org/">nginx.org</a>.<br/>
Commercial support is available at
<a href="http://nginx.com/">nginx.com</a>.</p>

<p><em>Thank you for using nginx.</em></p>
</body>
</html>

Configure custom site
Now that we’ve got all of that covered, let’s create a custom site. We'll need to create a folder for our site where all of our site code goes and we'll need to create an Nginx configuration for it.
We’ll store our site in the /var/www/ folder:
$ sudo mkdir -p /var/www/caseydunham.dev/html
You’ll notice that since we had to use sudo to create the folder, our html folder
is owned by the rootuser:
$ ls -l /var/www/caseydunham.dev/
total 4
drwxr-xr-x 2 root root 4096 Mar  2 18:50 html
Let’s change the owner to our user. The $USER environment variable is set the current user name:
$ sudo chown -R $USER:$USER /var/www/caseydunham.dev/html
We’ll also need to modify the folder permissions:
$ sudo chmod -R 755 /var/www/caseydunham.dev
Verify that our changes look good:
$ ls -l /var/www/caseydunham.dev/
total 4
drwxr-xr-x 2 casey casey 4096 Mar  2 18:57 html
Let’s create a placeholder index.html file:
$ nano /var/www/caseydunham.dev/html/index.html
Paste the following into the file, save and exit.
<html>
<head>
    <title>Welcome to caseydunham.dev!</title>
</head>
<body>
<h1>Thanks for reading!</h1>
</body>
</html>
Create the Nginx configuration for our site:
$ sudo nano /etc/nginx/sites-available/caseydunham.dev
The following is a very basic Nginx server block. This tells Nginx how to handle any connections
to that port and domain. In future posts, we'll look at this configuration a bit more. But for now this will
do. Pay attention to the server_name option. If you're configuring your domain with a
www domain, you'll want to add that in here as well, so it'd look like: `
server_name caseydunham.dev www.caseydunham.dev; `
But since I'm not using a subdomain, I'm going to go with this:
server {
        listen 80;
        listen [::]:80;

        server_name caseydunham.dev;
        root /var/www/caseydunham.dev/html;

        index index.html;

        location / {
                try_files $uri $uri/ =404;
        }
}
With that in place, there’s only one more thing to do and that’s to enable the site. To do this in Nginx we
create a symbolic link to our site configuration from our sites-available/caseydunham.dev
configuration to Nginx's sites-enabled folder.
$ sudo ln -s /etc/nginx/sites-available/caseydunham.dev /etc/nginx/sites-enabled/
It should look like this:
$ ls -l /etc/nginx/sites-enabled/
total 0
lrwxrwxrwx 1 root root 42 Mar  2 19:02 caseydunham.dev -> /etc/nginx/sites-available/caseydunham.dev
lrwxrwxrwx 1 root root 34 Mar  2 18:28 default -> /etc/nginx/sites-available/default
Our changes won’t take effect until we restart the Nginx service, but first, let’s test our configuration:
$ sudo nginx -t
nginx: the configuration file /etc/nginx/nginx.conf syntax is ok
nginx: configuration file /etc/nginx/nginx.conf test is successful
Once the configuration looks good, restart the Nginx service:
$ sudo systemctl restart nginx
Now we can test our website. From our host machine we can just use curl again:
% curl -i http://caseydunham.dev
HTTP/1.1 200 OK
Server: nginx/1.26.0 (Ubuntu)
Date: Sun, 02 Mar 2025 19:06:34 GMT
Content-Type: text/html
Content-Length: 149
Last-Modified: Sun, 02 Mar 2025 18:57:50 GMT
Connection: keep-alive
ETag: "67c4aa2e-95"
Accept-Ranges: bytes

<html>
    <head>
        <title>Welcome to caseydunham.dev!</title>
    </head>
    <body>
        <h1>Thanks for reading!</h1>
    </body>
</html>
Configure HTTPS
We're going to wrap this guide up by doing one last thing and that's configuring our site with a TLS
certificate. Along with getting a valid certificate there’s also additional Nginx changes required to enable
HTTPS on our site. While we can do these manually, we’ll just let certbot take care of the
configuration for us. Out of the box it’ll configure the recommended TLS settings, such as protocols and
ciphers along with a few other common things. Let’s install certbot and it’s Nginx plugin.
$ sudo apt -y install certbot python3-certbot-nginx

Installing:
  certbot  python3-certbot-nginx

Installing dependencies:
  python3-acme  python3-certbot  python3-configargparse  python3-icu  python3-josepy  python3-parsedatetime  python3-rfc3339  python3-tz

Suggested packages:
  python-certbot-doc  python3-certbot-apache  python-acme-doc  python-certbot-nginx-doc

Summary:
  Upgrading: 0, Installing: 10, Removing: 0, Not Upgrading: 0
  Download size: 1144 kB
  Space needed: 5873 kB / 22.6 GB available
...
Certbot needs the domain names that we’re configuring. These are the same names defined in the above Nginx
server_name configuration. For my purposes, I’m not using the www subdomain, but
if you have one configured in your Nginx configuration, you’ll want to pass that along like so by specifying
them with additional -d parameters:
$ sudo certbot --nginx -d caseydunham.dev -d www.caseydunham.dev
For my purposes, I’m just using the following:
$ sudo certbot --nginx -d caseydunham.dev
This will output a bit of information and ask you a few questions regarding agreeing to the terms of service and adding an email contact. Once done it should indicate success and list the location of the certificate files:
Saving debug log to /var/log/letsencrypt/letsencrypt.log
Enter email address (used for urgent renewal and security notices)
 (Enter 'c' to cancel): casey@caseydunham.com

- - - - - - - - - - - - - - - - - - - - - - - - - - - - - - - - - - - - - - - -
Please read the Terms of Service at
https://letsencrypt.org/documents/LE-SA-v1.5-February-24-2025.pdf. You must
agree in order to register with the ACME server. Do you agree?
- - - - - - - - - - - - - - - - - - - - - - - - - - - - - - - - - - - - - - - -
(Y)es/(N)o: Yes
...
Requesting a certificate for caseydunham.dev
...
Successfully received certificate.
Certificate is saved at: /etc/letsencrypt/live/caseydunham.dev/fullchain.pem
Key is saved at:         /etc/letsencrypt/live/caseydunham.dev/privkey.pem
This certificate expires on 2025-05-31.
These files will be updated when the certificate renews.
Certbot has set up a scheduled task to automatically renew this certificate in the background.

Deploying certificate
Successfully deployed certificate for caseydunham.dev to /etc/nginx/sites-enabled/default
Congratulations! You have successfully enabled HTTPS on https://caseydunham.dev
...
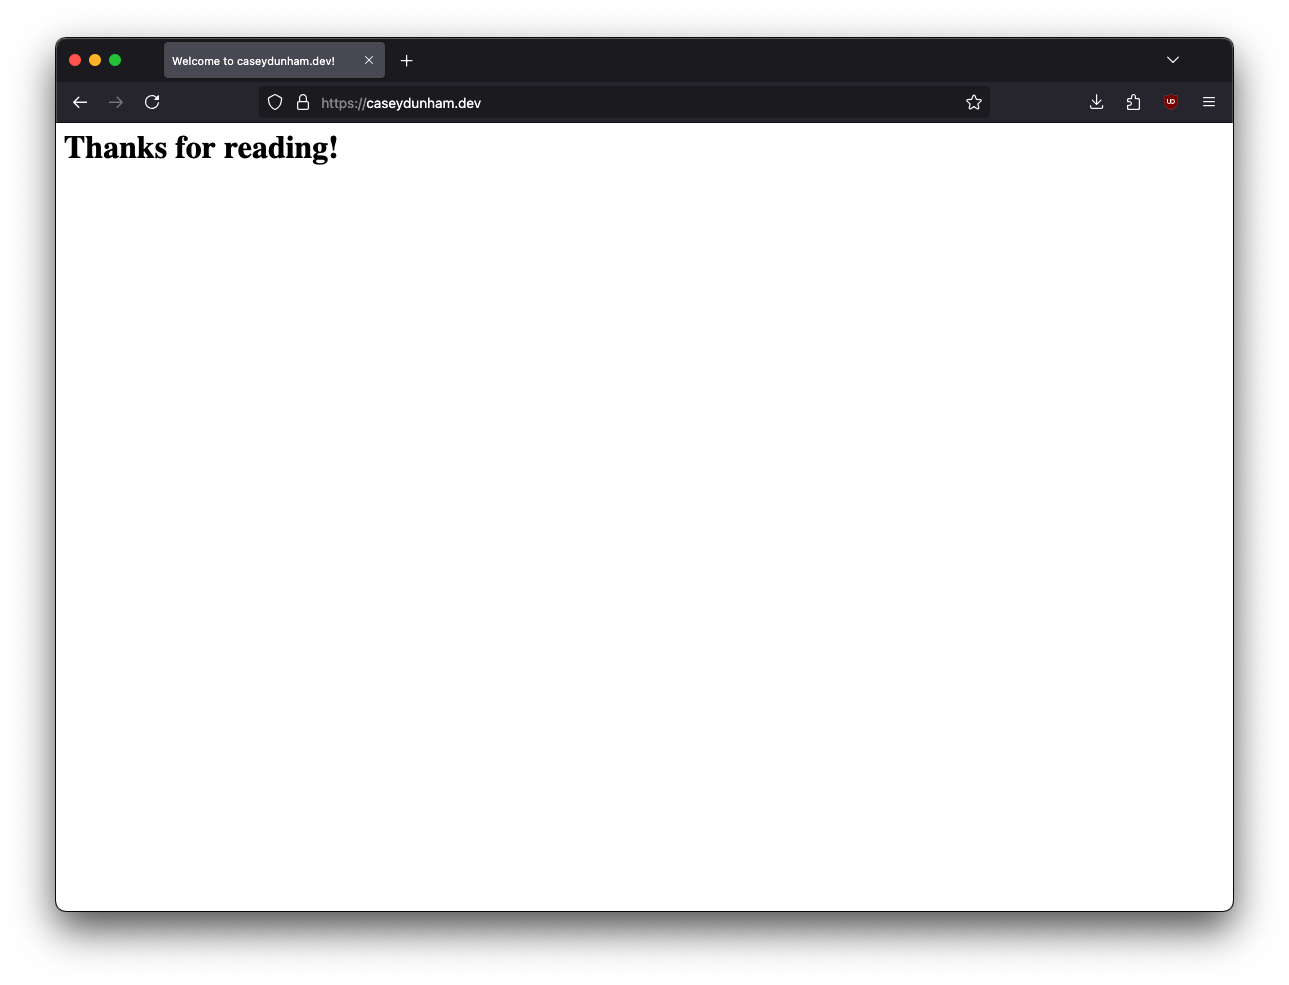
Now we can access the site in a browser without any issues and it will show as being secured:
Now there’s only one thing left. The TLS certificates we get from Let’s Encrypt are set to expire after six
months. To ensure that our site doesn’t break when the certificate expires, and so we don’t have to manually
renew it, certbot will auto-renew it through a scheduled task.
Verify that it is running:
$ sudo systemctl status certbot.timer
● certbot.timer - Run certbot twice daily
     Loaded: loaded (/usr/lib/systemd/system/certbot.timer; enabled; preset: enabled)
     Active: active (waiting) since Sun 2025-03-02 19:07:40 UTC; 36min ago
 Invocation: 3a69f3c7fc5345959c55a5e1f60fa26d
    Trigger: Mon 2025-03-03 11:02:22 UTC; 15h left
   Triggers: ● certbot.service

Mar 02 19:07:40 ubuntu-s-1vcpu-1gb-nyc3-01 systemd[1]: Started certbot.timer - Run certbot twice daily.
And, just to verify that it’ll run successfully, we can do a dry run of the renewal:
$ sudo certbot renew --dry-run
Saving debug log to /var/log/letsencrypt/letsencrypt.log

- - - - - - - - - - - - - - - - - - - - - - - - - - - - - - - - - - - - - - - -
Processing /etc/letsencrypt/renewal/caseydunham.dev.conf
- - - - - - - - - - - - - - - - - - - - - - - - - - - - - - - - - - - - - - - -
Account registered.
Simulating renewal of an existing certificate for caseydunham.dev

- - - - - - - - - - - - - - - - - - - - - - - - - - - - - - - - - - - - - - - -
Congratulations, all simulated renewals succeeded:
  /etc/letsencrypt/live/caseydunham.dev/fullchain.pem (success)
- - - - - - - - - - - - - - - - - - - - - - - - - - - - - - - - - - - - - - - -
And that's our base Nginx configuration for our custom site. In the next section we'll just validate our servers TLS settings, but we're currently done with our basic website configuration.
Checking Our TLS Configuration
To check that certbot configured our HTTPS connection with appropriate TLS protocols and
ciphers, we'll use two tools:
- Qualys SSL Test
- testssl.sh
Both tools will analyze the SSL/TLS configurations (among other things), to ensure that connections to our
server are as secure as we can get. Qualys hosts a free SSL test tool that is well-known and used often.
It's easy to use, but the site your testing needs to be public on the internet. However, if you want to
check the configuration of a local or internal site, I recommend the testssl.sh script. This is
my goto for every assessment and if you're comfortable with the command line, I recommend it. At the end of
the output, this tool will also calculate a grade score using the same algorithm Qualys does. So handy for
comparisons.
Qualys SSL Test
For Qualys, just goto their tools here and enter the URL of your site and after a few minutes, you'll get a nice little report and a grade.
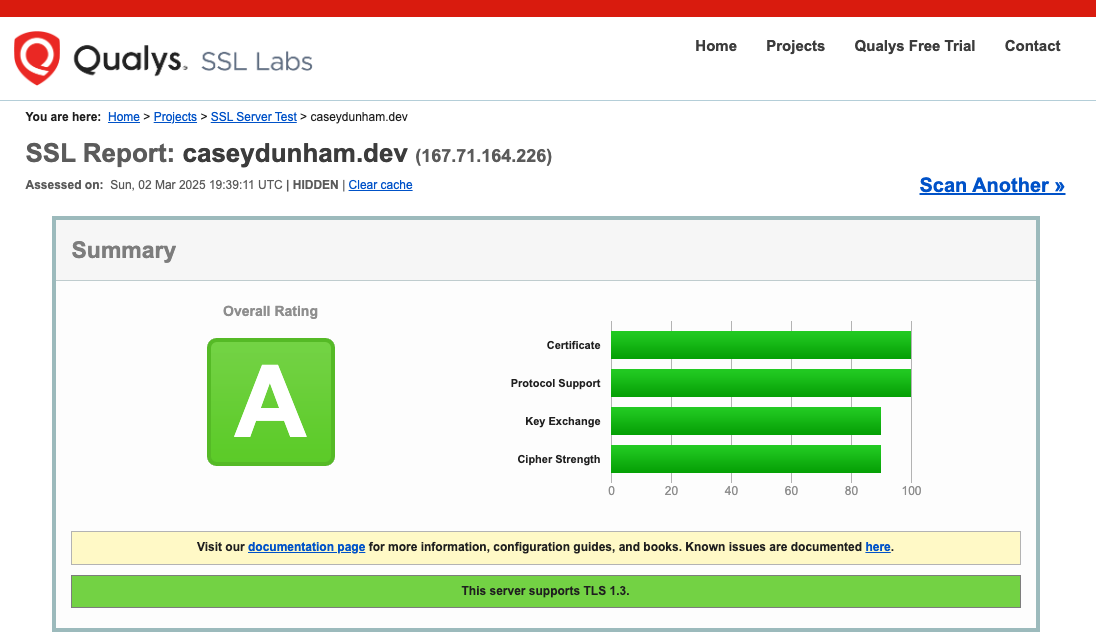
In most cases, an A is easy to achieve as long as you're not needed to support connections from older
clients. Balancing usability and security is always a balancing act, but unless you need to allow
connections from very old clients, you're probably good with the certbot defaults.
testssl.sh
If your server isn't available to the public internet, or you'd prefer an offline tool, the fantastic testssl.sh
script is what I use on every assessment. This tools has a lot of options and I'll probably write more on it
later, but just passing the server address will give you the same output you'll get from the Qualys tool.
% ./testssl.sh caseydunham.dev

#####################################################################
  testssl.sh version 3.2rc3 from https://testssl.sh/dev/
  (b5ad5bd 2024-12-06 15:03:47)

  This program is free software. Distribution and modification under
  GPLv2 permitted. USAGE w/o ANY WARRANTY. USE IT AT YOUR OWN RISK!

  Please file bugs @ https://testssl.sh/bugs/

#####################################################################

  Using OpenSSL 1.0.2-bad   [~183 ciphers]
  on Caseys-MBP:./bin/openssl.Darwin.x86_64

 Start 2025-03-02 14:38:42                -->> 167.71.164.226:443 (caseydunham.dev) <<--

 rDNS (167.71.164.226):  --
 Service detected:       HTTP

 Testing protocols via sockets except NPN+ALPN

 SSLv2      not offered (OK)
 SSLv3      not offered (OK)
 TLS 1      not offered
 TLS 1.1    not offered
 TLS 1.2    offered (OK)
 TLS 1.3    offered (OK): final
 NPN/SPDY   not offered
 ALPN/HTTP2 http/1.1 (offered)

 Testing cipher categories

 NULL ciphers (no encryption)                      not offered (OK)
 Anonymous NULL Ciphers (no authentication)        not offered (OK)
 Export ciphers (w/o ADH+NULL)                     not offered (OK)
 LOW: 64 Bit + DES, RC[2,4], MD5 (w/o export)      not offered (OK)
 Triple DES Ciphers / IDEA                         not offered
 Obsoleted CBC ciphers (AES, ARIA etc.)            not offered
 Strong encryption (AEAD ciphers) with no FS       not offered
 Forward Secrecy strong encryption (AEAD ciphers)  offered (OK)
...
 Rating (experimental)

 Rating specs (not complete)  SSL Labs's 'SSL Server Rating Guide' (version 2009q from 2020-01-30)
 Specification documentation  https://github.com/ssllabs/research/wiki/SSL-Server-Rating-Guide
 Protocol Support (weighted)  100 (30)
 Key Exchange     (weighted)  100 (30)
 Cipher Strength  (weighted)  90 (36)
 Final Score                  96
 Overall Grade                A
 Grade cap reasons            Grade capped to A. HSTS is not offered
As we can see, the changes that certbot makes for us to our Nginx configuration are perfectly
acceptable.
Conclusion
In conclusion, we've made it from a basic server install to a working website in Nginx. Along the way, we've made a few security conscious improvements to our server and ensuring that those connecting to our site can have the strongest cryptographic protocols available to do what we can to ensure their privacy.
I've had fun writing this and I hope that this has been helpful!
Thank you for reading. I appreciate your time.
Until next time.
<3